It’s been a few years since I last posted. Today I’m writing about the MacchiatoBin – see http://macchiatobin.net
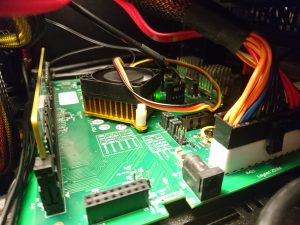
The MacchiatoBIN is a development board based around the Marvell 8040 SoC, which is intended to be used in network equipment. Having worked for some years at Arm, one thing I’ve been wanting is a decent Arm computer at home. The MacchiatoBIN is the first thing that could be described as a real computer, for the following reasons:
- It comes in a standard form factor. It is actually mini-ITX, and so it can be installed into a standard case (see below).
- It has a DIMM slot, so can take 16GB of RAM. That’s pretty decent.
- It has 3 SATA powers. You can actually have decent I/O (to be measured).
- There is a 1GB ethernet port. In fact, the Double Shot I have has 1x1GB, 2x10GB (SFP+ and copper), and 1×2.5GB (SFP) ports. Of course, it is built around a networking chip.
- It has UEFI. It is a development board, so it can load firmware from SD card, eMMC or SPI ROM.
- There is a USB2 header, and USB 3.0 at the rear. My case has USB 2 at the front.
- There is a reset button on the board. Fine, but there is a reset header too, so your case’s reset switch will work.
- There is a PCI-e x4 3.0 slot. While it is only x4, it is an open-ended slot, so larger cards will fit.
- There are 4xCortex A72s. They are better than Cortex-A57s and they are set to run at 2.0 GHz. These are out-of-order cores, so they are interesting from a performance perspective.
There are all good things – not necessarily brilliant, but it is a good step. I wouldn’t be interested if they were Cortex-A53s – they just aren’t interesting for performance reasons. Unlike other development board projects, having a standard format really does sell the idea as you can stick it in any consumer case.
There are some shortcomings, however:
- 8 x Cortex-A72s would have been just perfect. As it is, building OpenJDK on my i7 Ultrabook takes about 12 minutes. On this MacchiatoBIN it takes 20 minutes. Decent and usable, but could be better.
- The firmware and kernel are quite raw. In the future it ought to just work with UEFI, but there are some outstanding issues.
- The PCI-e slot won’t work with modern graphics cards just yet – using it as a desktop machine won’t work just yet. Cards tend to lock up the machine, or when they do work, train at slow speeds. You might be lucky with an old card. (An Nvidia 6200 might be ok).
- The ATX power supply is controlled by the PSU power switch. The power button on your case will do nothing. Also, the machine can’t power itself off.
I’m interested in addressing the last point. I run my home server and this machine off of a UPS. For that reason I would like the machine to be able to do a controlled shutdown if power is lost. To that end I’m investigating using a micro-controller to control the ATX power.
The ATX power standard has two relevant features. Firstly, the PSU, even when the machine is off, supplies 5V on standby. Obviously if you turn the PSU off at it’s own switch or the socket there is no standby power. Secondly, the motherboard can signal to the PSU to turn supply power by shorting the PS_ON# pin to ground (see https://en.wikipedia.org/wiki/ATX#Power_supply). The MacchiatoBIN circuit diagram explicitly states that these are permanently shorted.
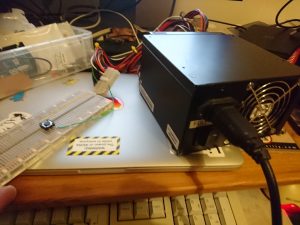
I have an Arduino, and an old power supply, so I can prototype this. My first experiment is simply to see if I can manually turn on the power supply. I could just jam a paperclip into the appropriate pins, but instead I hooked up a breadboard with a button.
The 20-pin ATX connector has the same pins as the more recent 24-pin connectors, less 4, so in practice it is the same here.
No heat, not smoke, it just worked.
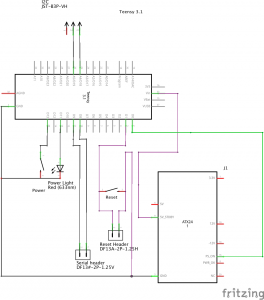
The end goal is to wire up a microcontroller to the PSU lines, the case LED and power switch and a serial port such that the machine will work like a normal PC and be able to be operated by its power switch and have the kernel shut itself down.
While there is a microcontroller attached to power and serial ports, there is a stretch goal of fashioning it into a BMC, but I’ll talk about that another time.


